Space AI User Guide
BETA ROUND 1
Overview
- Download and install the Enviz SketchUp plugin: Link to SketchUp Wearhouse
- Use the SketchUp plugin to prepare your model and export it ready for processing
- Upload your .enviz file to https://spaceai.enviz.co/
- Experience your space using our Quest, iOS and Android apps or desktop browser(mobile browser coming soon)
Need a hand?
Reach out to us anytime in the Enviz Community Slack or contact us on our website.
3D Model Recommendations
Quick tips to ensure you 3D model is set up for success.
- Open doors to any rooms that you want to be accessible, if they are closed you wont be able to walk into these spaces.
- Parallel faces can cause flickering, technically known as z-fighting. Try to avoid this in your model but you may need to upload your model at least once to identify where this is happening before correcting it.

- We limit surface area of experiences. Avoiding large flat planes around your model will leave more space for the interesting parts of your model.
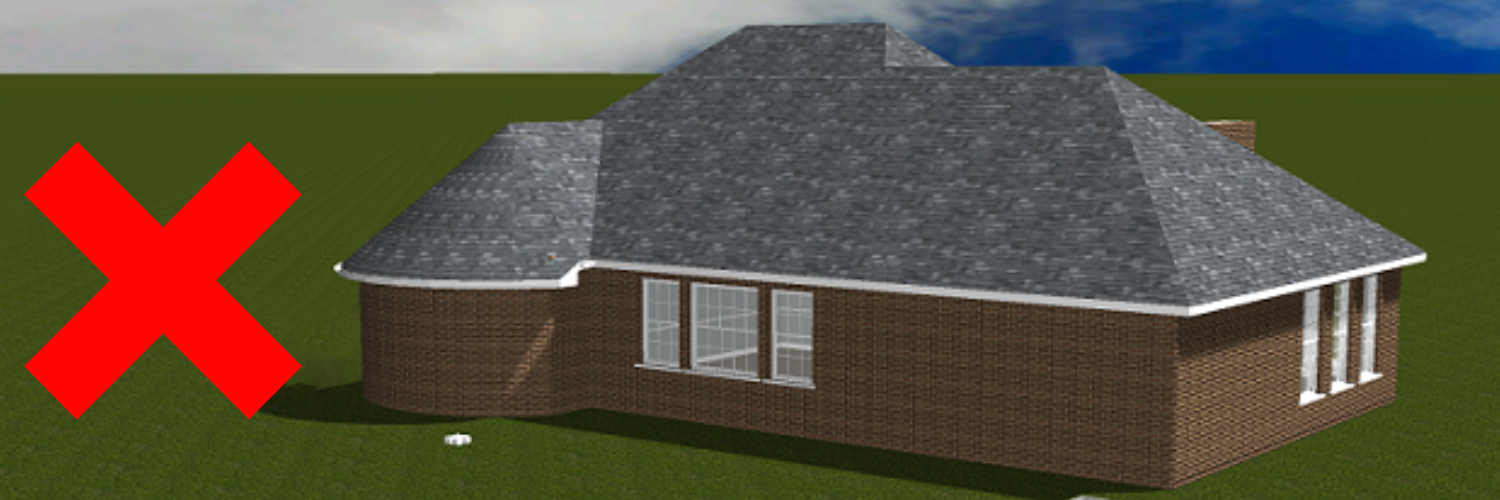
- Watch out for intersecting geometry in your model and fix it where possible. While intersecting geometry doesn't cause technical issues, it doesn't look great aesthetically.
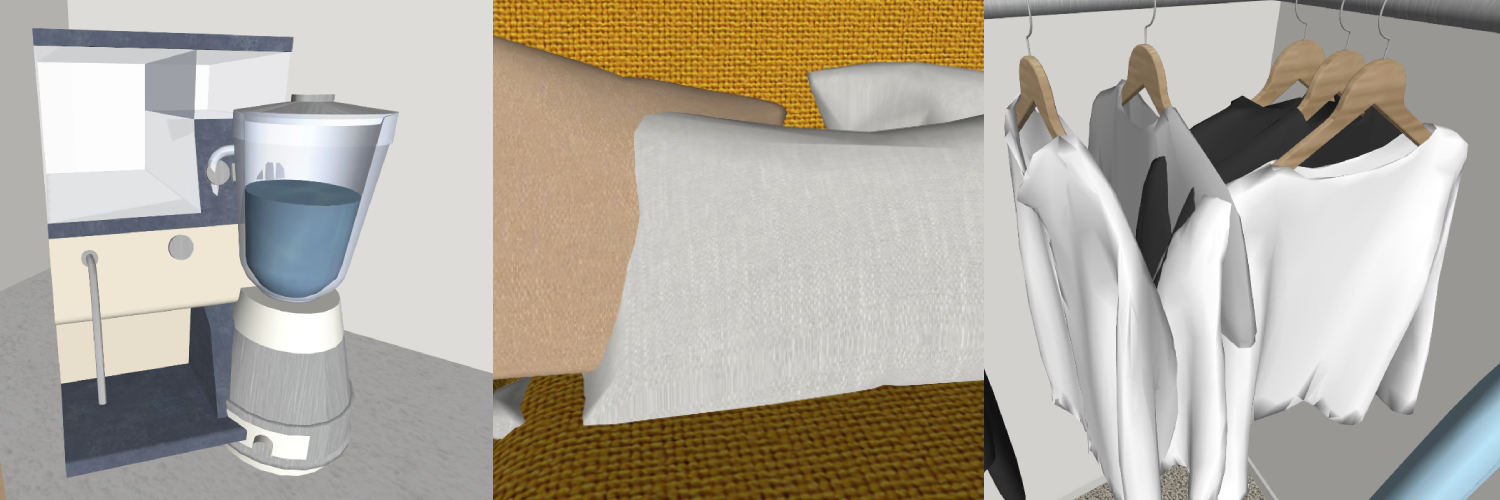
Preparing your model
1. Open your chosen model in SketchUp

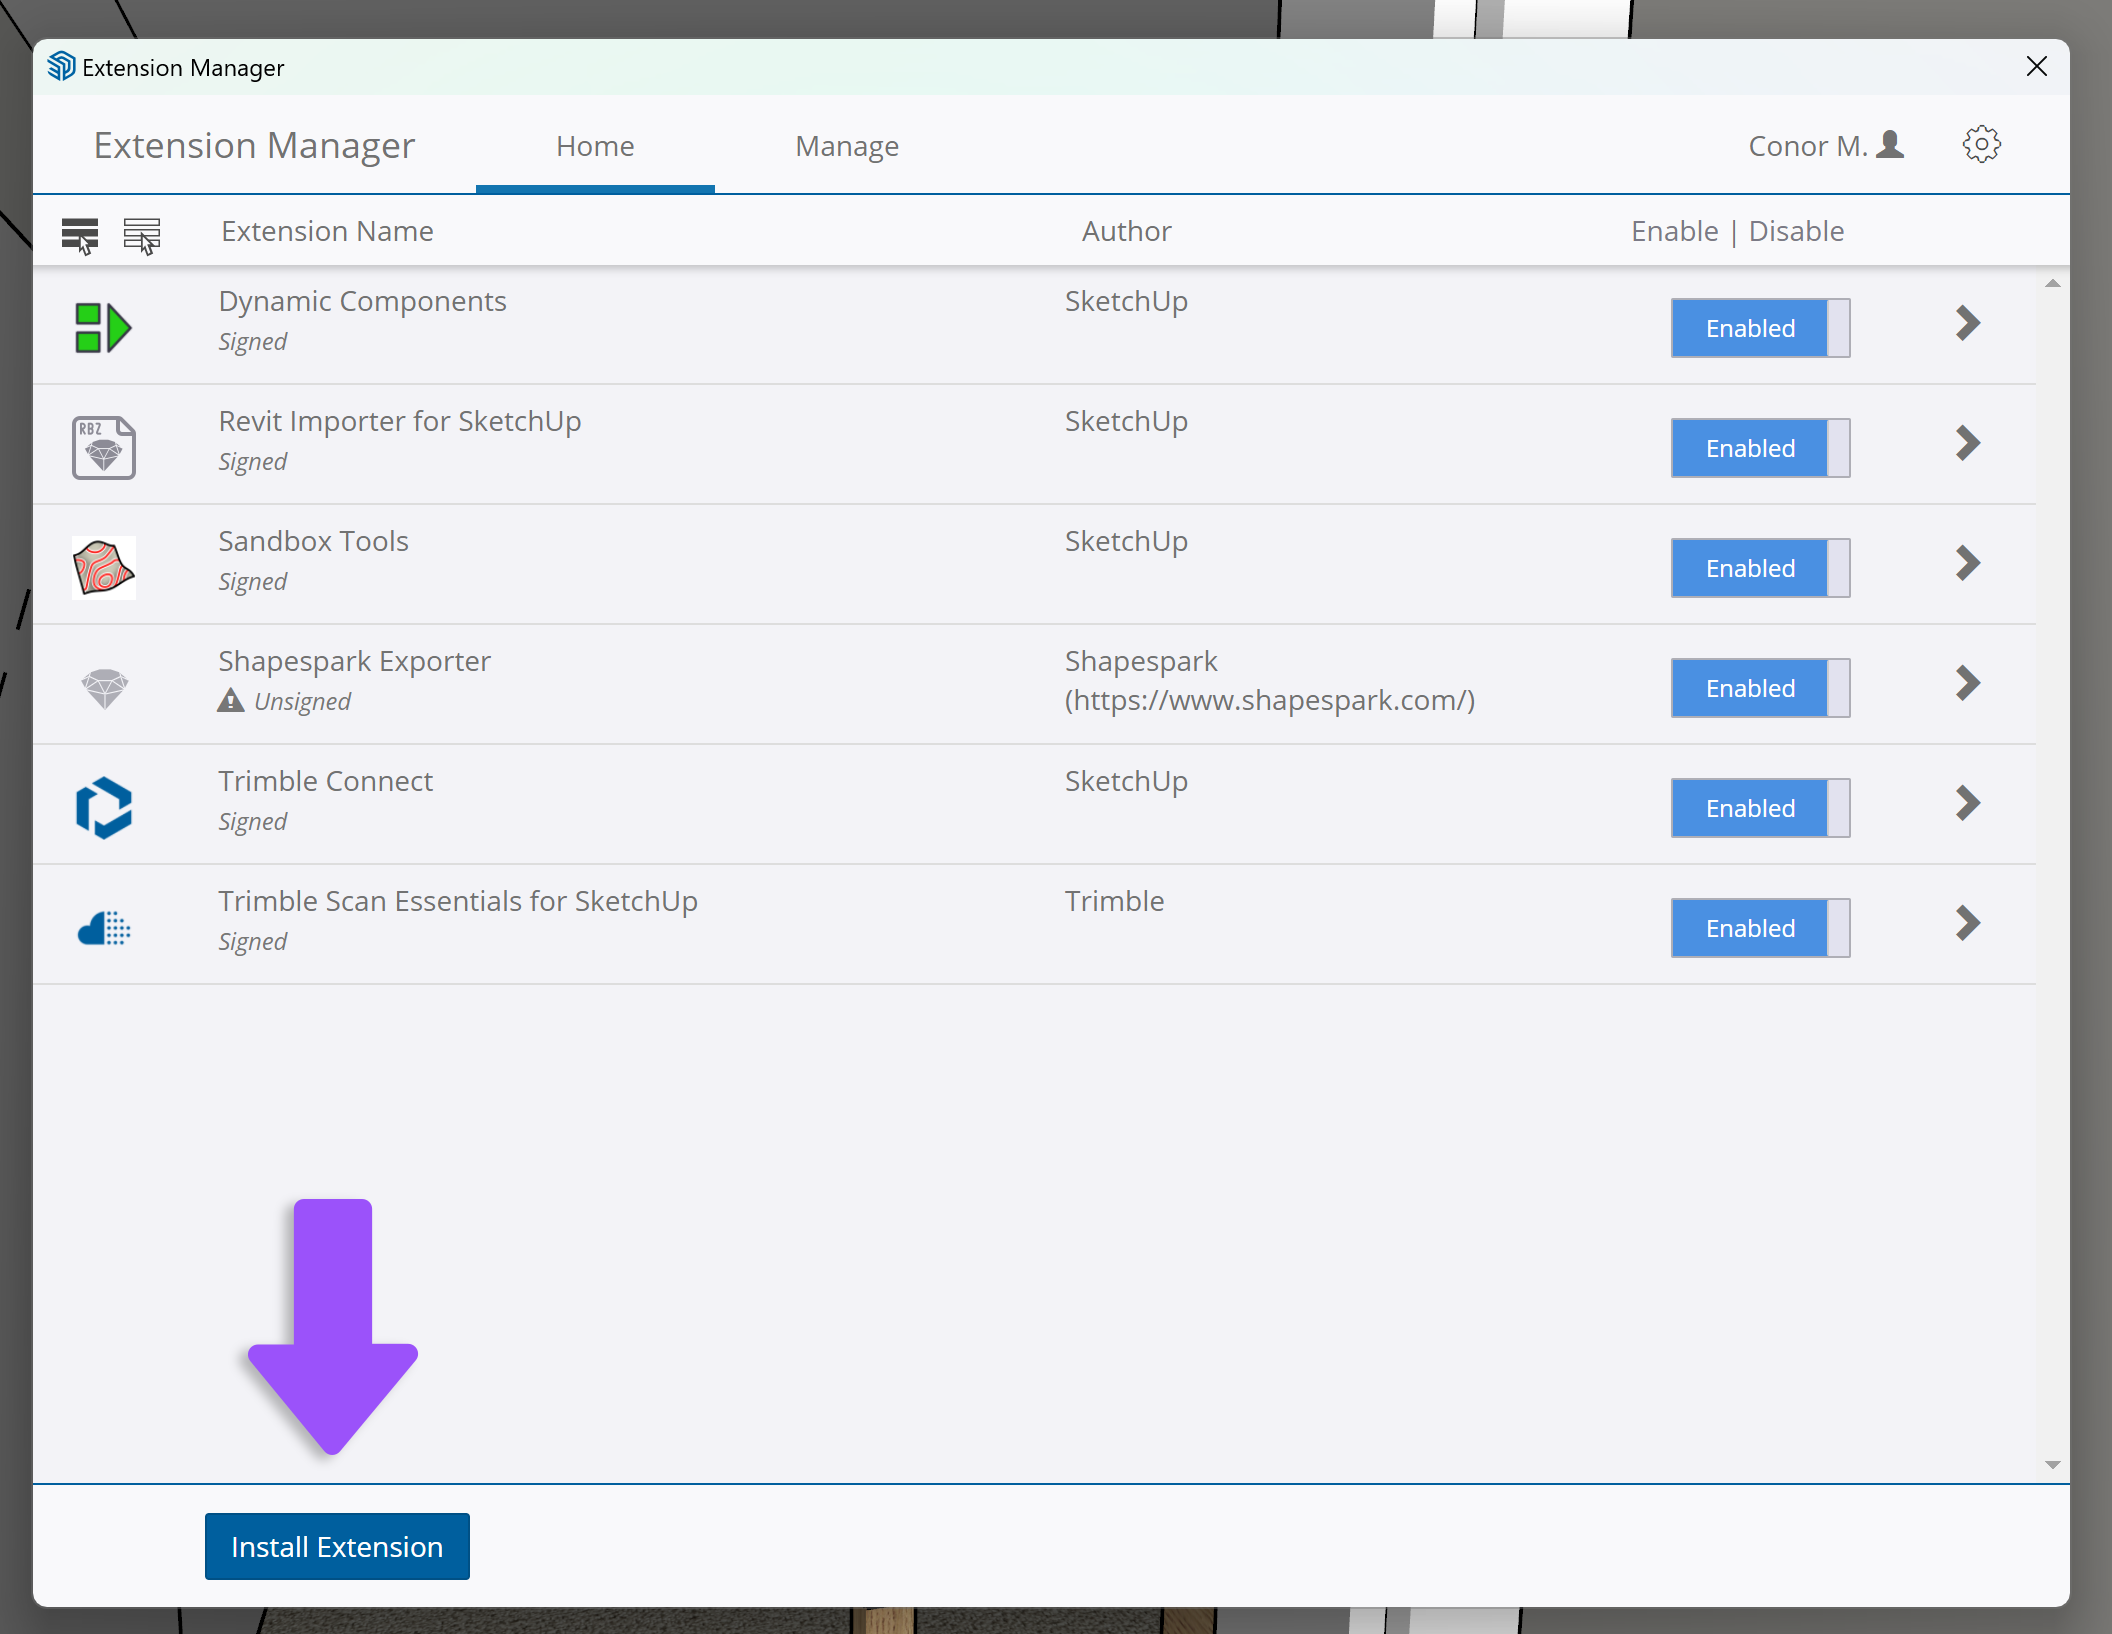
2. Install the Enviz SketchUp plugin by opening the extensions menu, then press ‘Extension Manager’

3. Click on ‘Install Extension’ and locate the .rbz plugin file. You can find the plugin where you got this guide, or you can download it from this link: Enviz Plugin
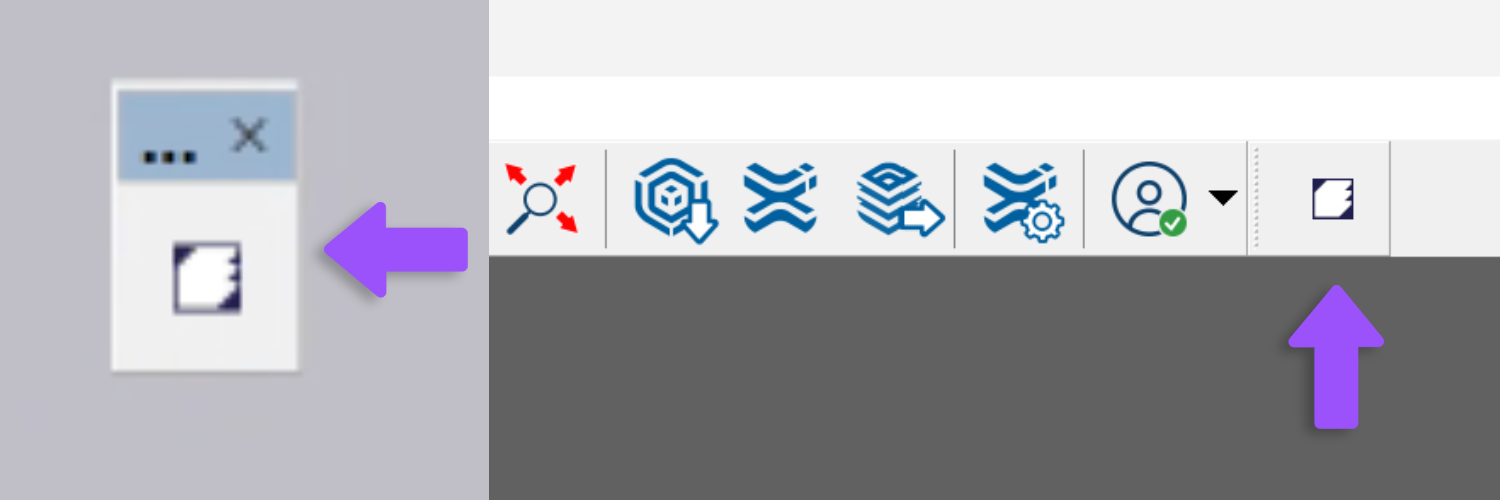
4. Open the Enviz plugin by clicking the button that just appeared. You can also drag it to dock it into the top icon bar.
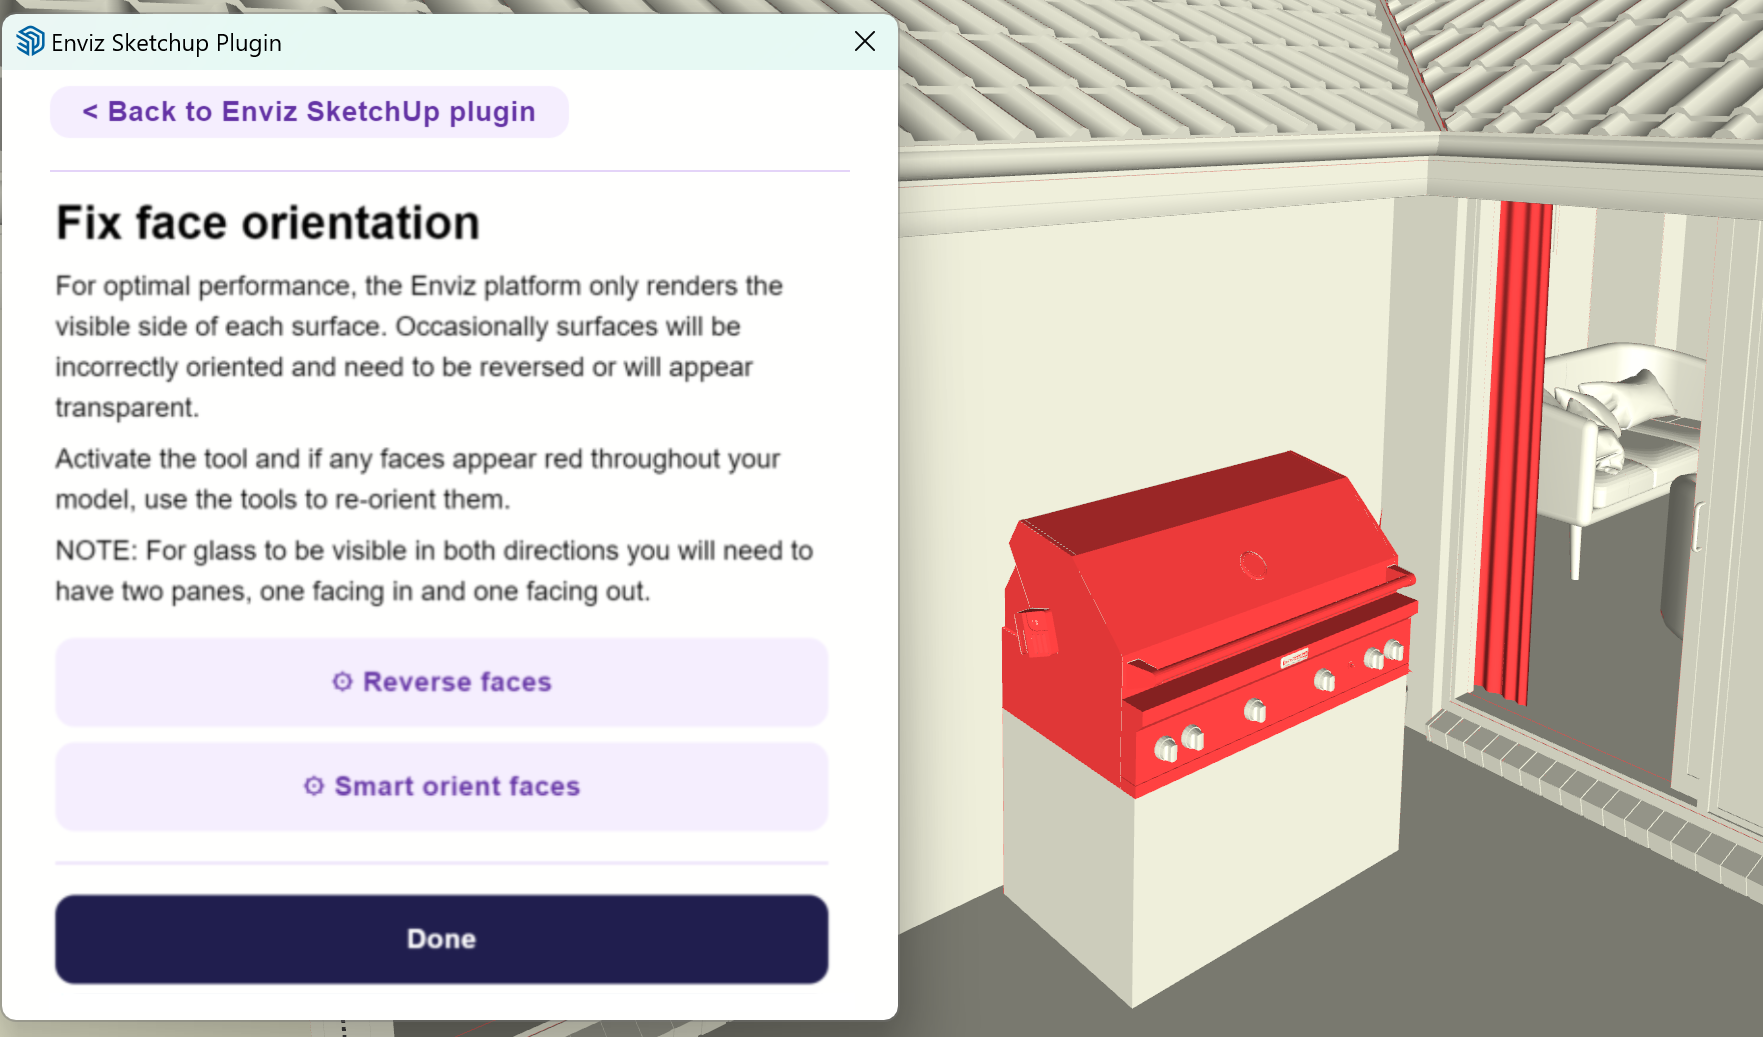
6. Plugin Step 1: Fix Face Orientation
To optimise performance, the Enviz platform only renders a single face of each surface. you will need to check that surfaces are oriented correctly towards the point of view.
There are two options within this tool:
Option 1
‘Reverse faces’ will flip individual faces, this is useful for cleaning up very specific faces that are causing you trouble when using the second option. You can hold-click to flip multiple surfaces.
Option 2
‘Smart orient faces’ is a bulk face flipper, it will let you flip whole sections of face.
With one of the two options activated click every red object with the mode active until everything is the grey/cream colour, then press done. We recommend using ‘Smart orient faces’ at first to expedite the process.
For glass to be visible in both directions you will need to have two seperate panes, one facing in and one facing out.
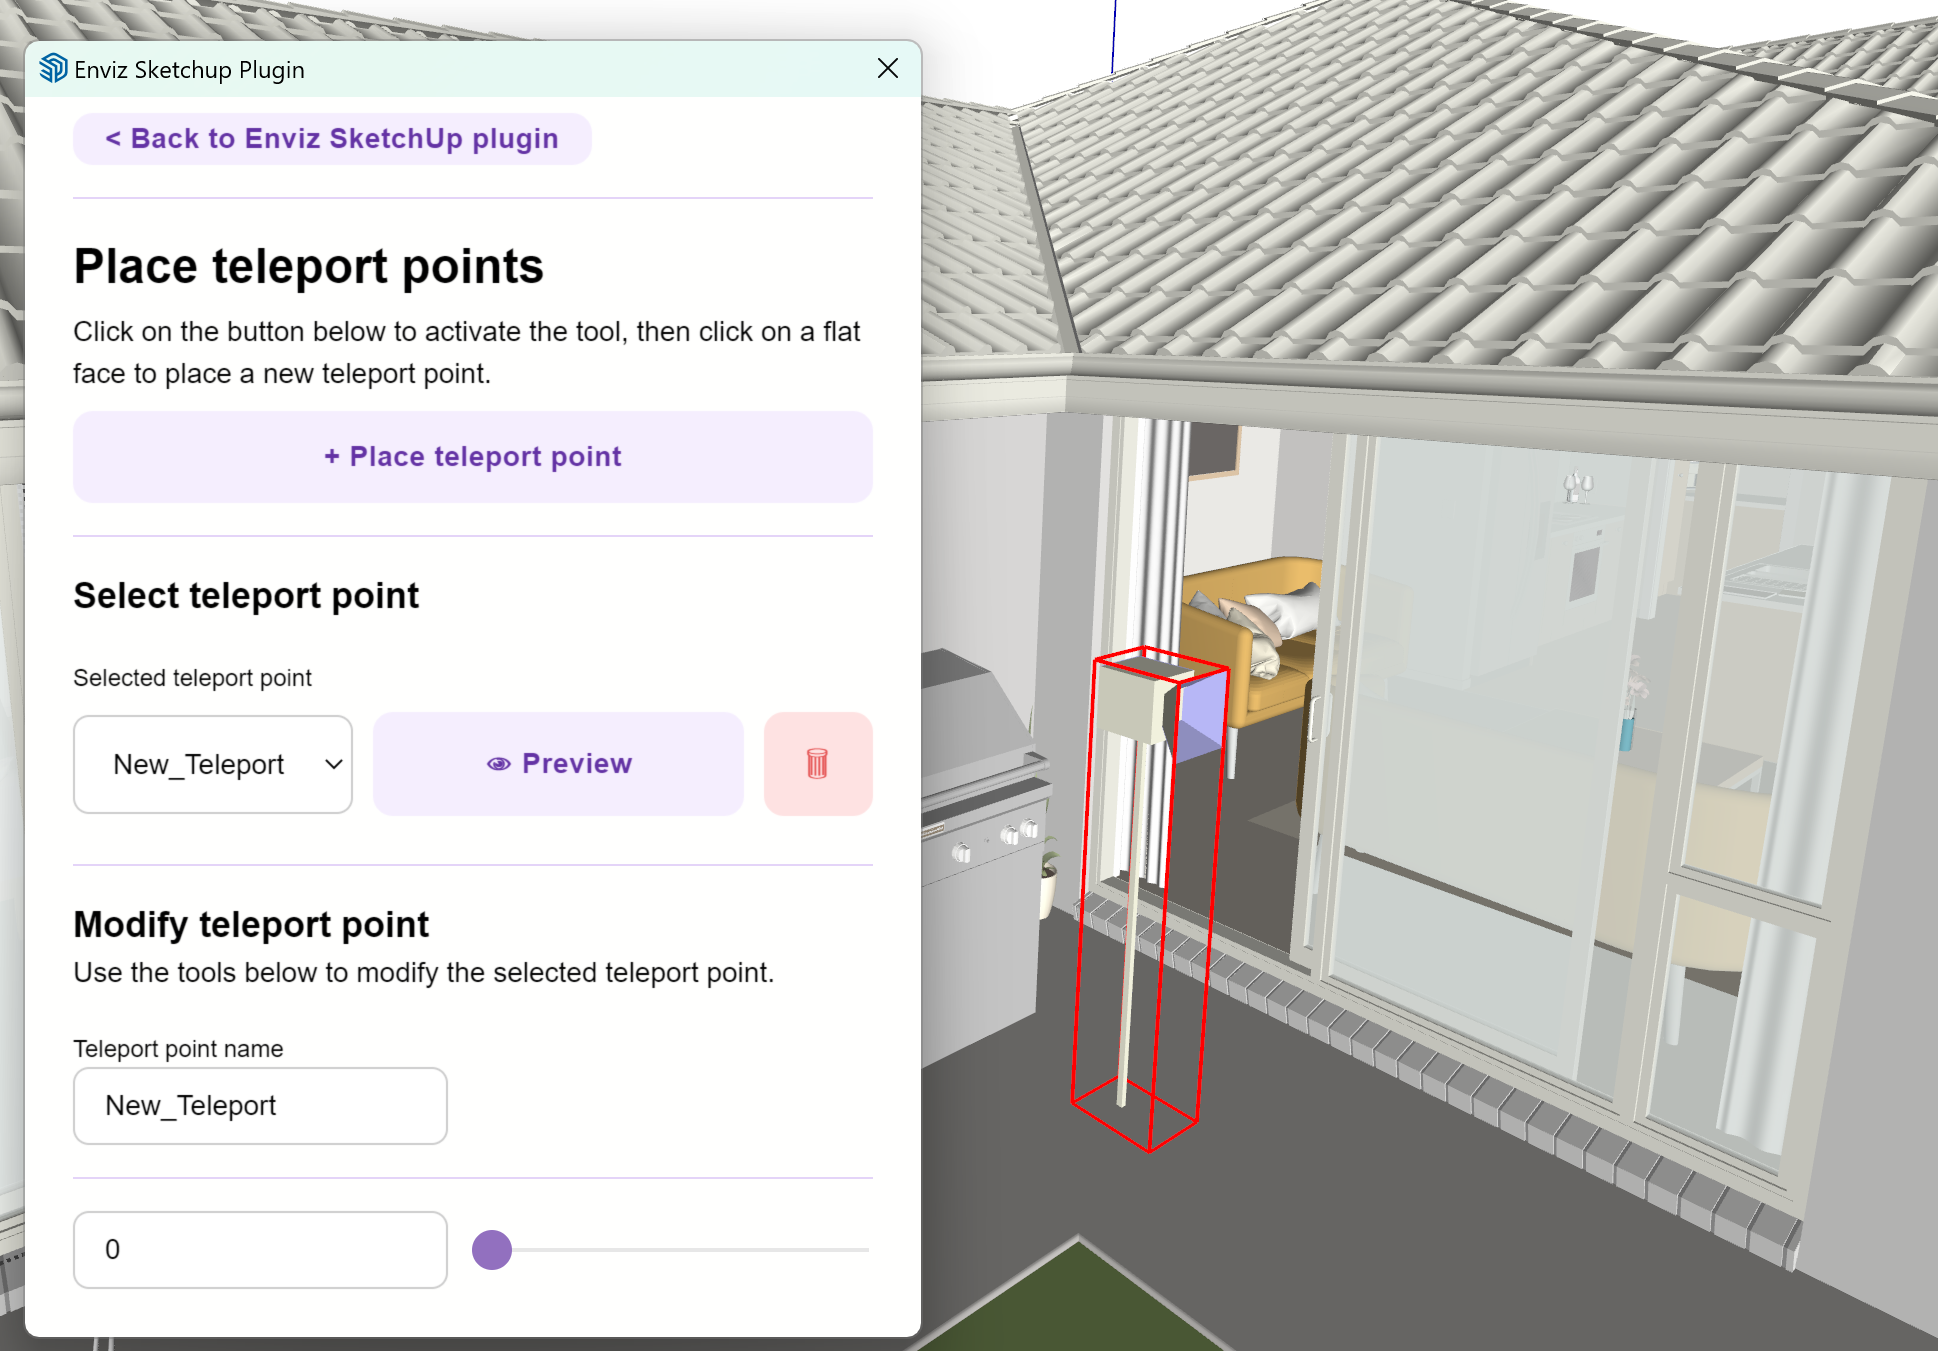
7. Plugin Step 2: Place teleport points.
Teleport points are used for several navigation features in your experience. You will need to identify and name each primary area of your space with a teleport point.
Press ‘+ Place teleport point’ to add a new point. Click somewhere in the scene to place the camera on the floor. Name the space and use the slider at the bottom of the tool to rotate the viewing position around.
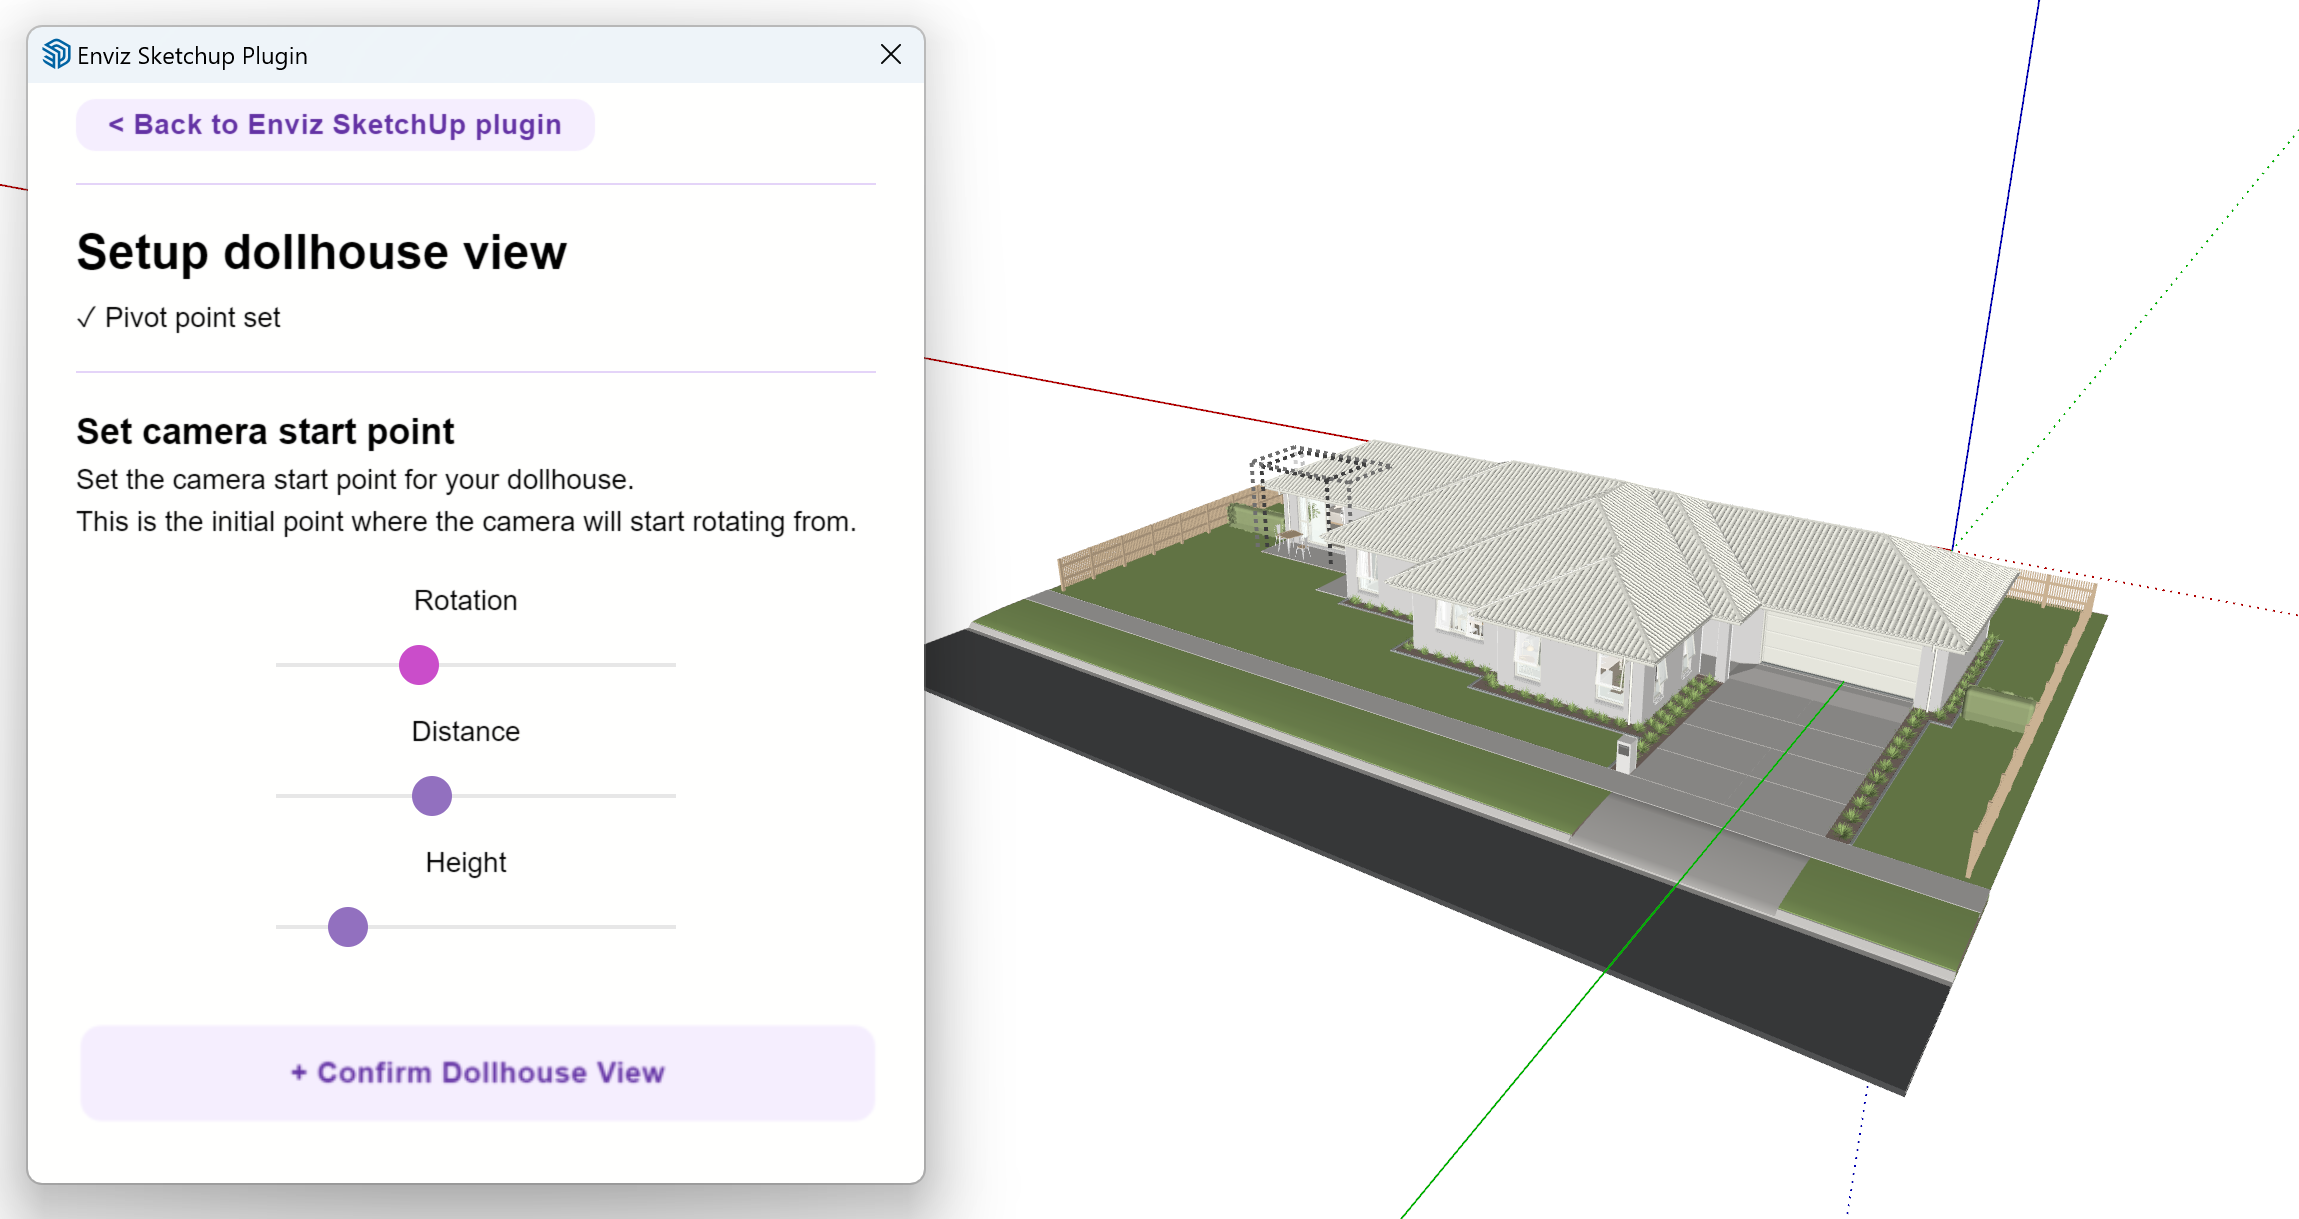
8. Plugin Step 2: Dollhouse View
Dollhouse View creates an interactive miniature of your space.
First set up the pivit point around which your dollhouse view will rotate. This should be central to your space and at ground floor.

Now use the sliders to set the rotation, distance and height of the starting camera point. Hit ‘confirm start point’ when you are happy. This is the starting view when users click the dollhouse button in your experience.
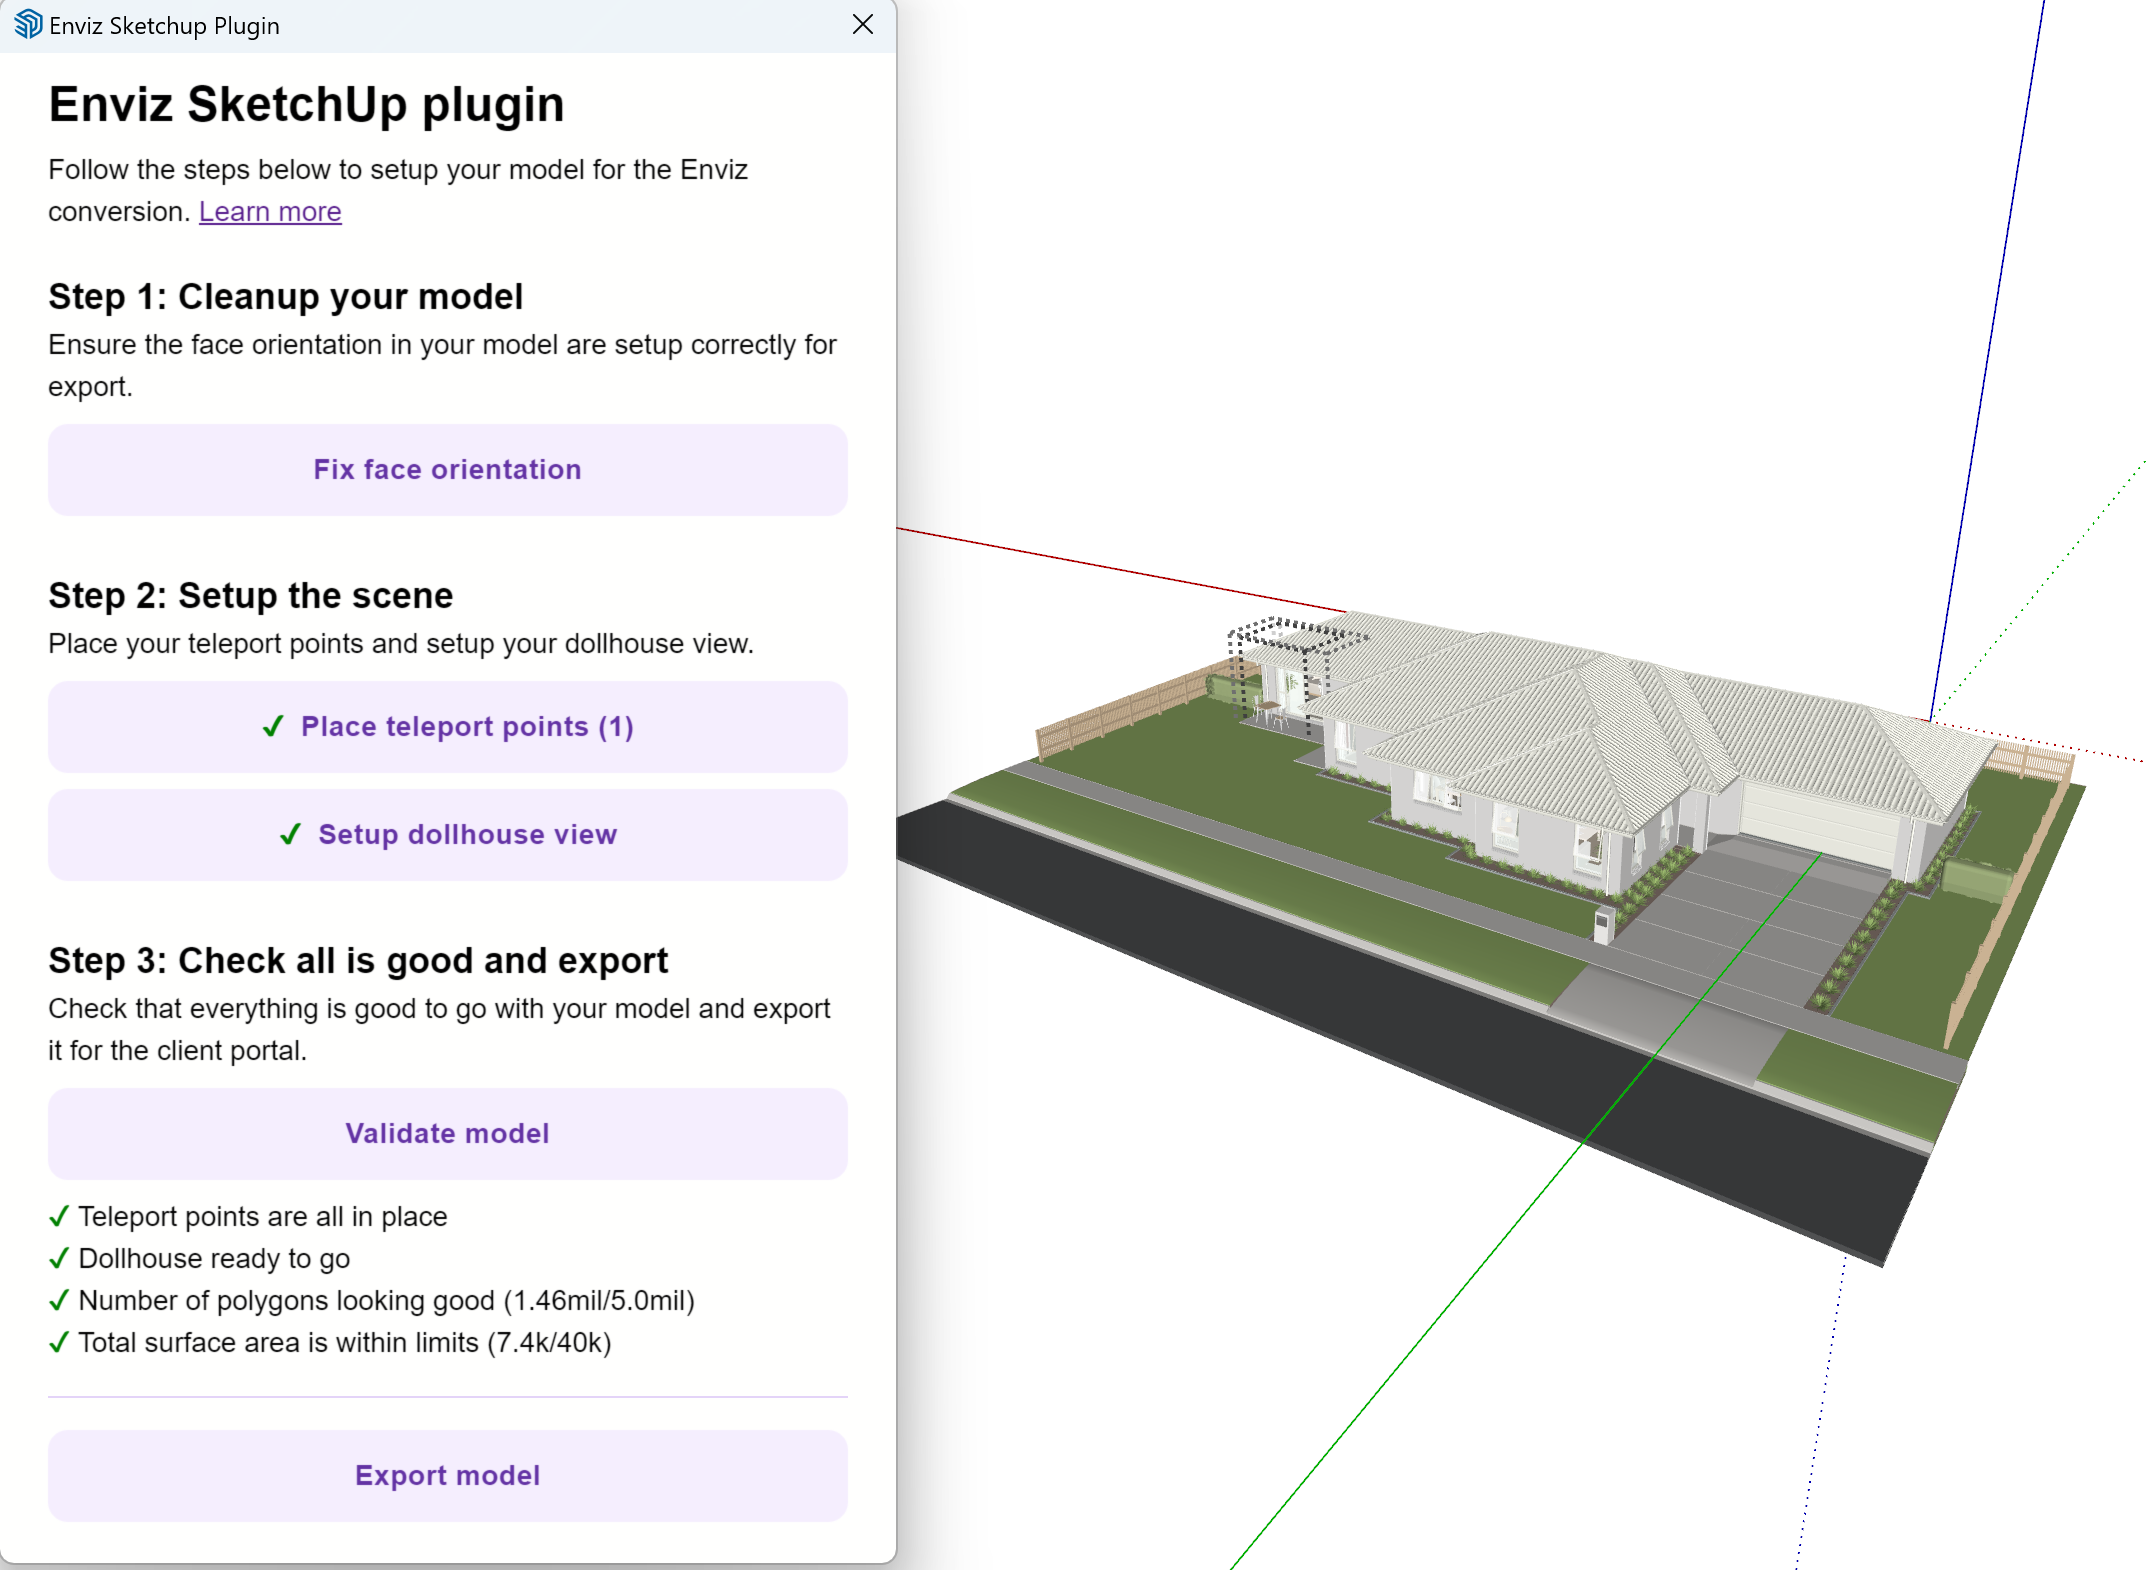
9. Step 3: Validate model
Click the ‘validate model’ button to confirm your model is within size limits and all steps have been complete, it will take a moment to check your model.
Remember, there's a limit to how many polygons are allowed. If you have too many polygons, try replacing some objects with simpler ones or removing objects from the scene. Enviz does not support dense planting while in beta.If the surface area is too large, consider removing big patches of grass or empty spaces. As a last option, removing objects will also reduce the total surface area.
10. Save your modified SketchUp file.
11. Click on ‘Export model’ in the main menu. It will ask you to choose a folder. This is because our process stores some temporary files as it compiles your .enviz file. After the export finishes (which might take some time), you'll find a single .enviz file in the folder you selected.
Submitting your first .enviz file
1. Go to the Enviz Space AI upload page to submit your first model.
2. Complete the form and upload your .enviz file using the file picker.You will receive an email with your auto-generated Enviz password, details about the progress of your experience, and codes to access your experience once complete. If you don't see an email from us, remember to check your junk/spam folder. You can also track the progress of your experience using our online portal.
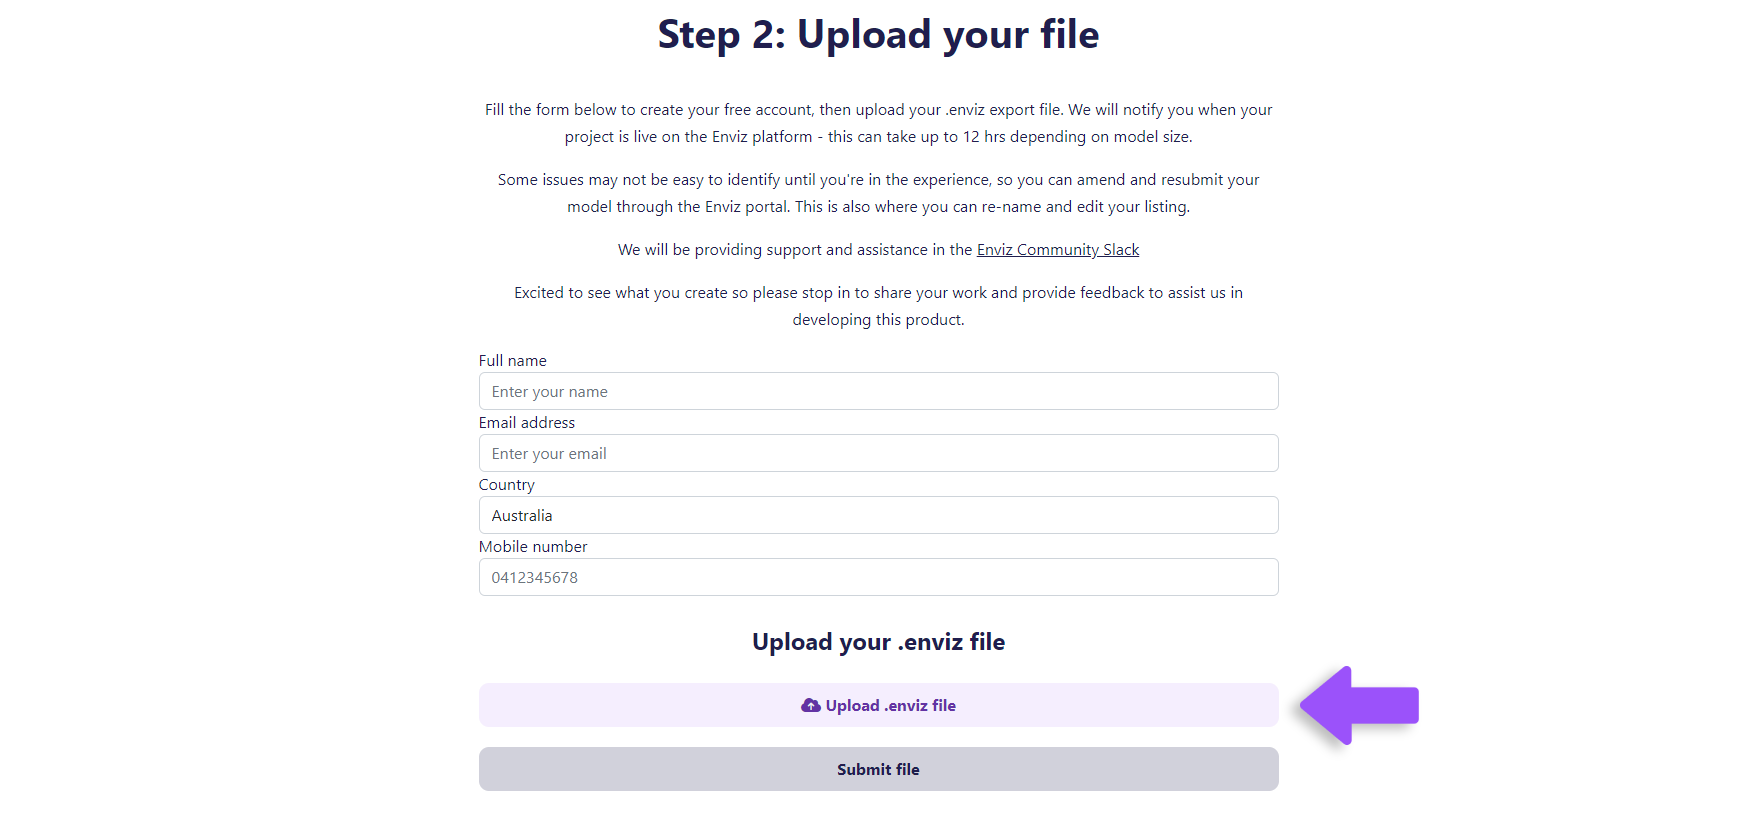
3. That’s it for now! We’ll email you when your experience is ready. Here's some info on how to log in to our online portal. You'll need to log in to submit any additional revisions to ensure your experience is exactly how you want it.
How to submit a revision
Often issues like z-fighting flickering are difficult to identify until you’re in the experience, and as such will require some amendments to your model before re-submitting. Follow the steps below to re-submit your model. We’re interested to hear how many revisions you required to get your space perfect.
1. Log in to the Enviz Portal using the temporary password we send you via email.
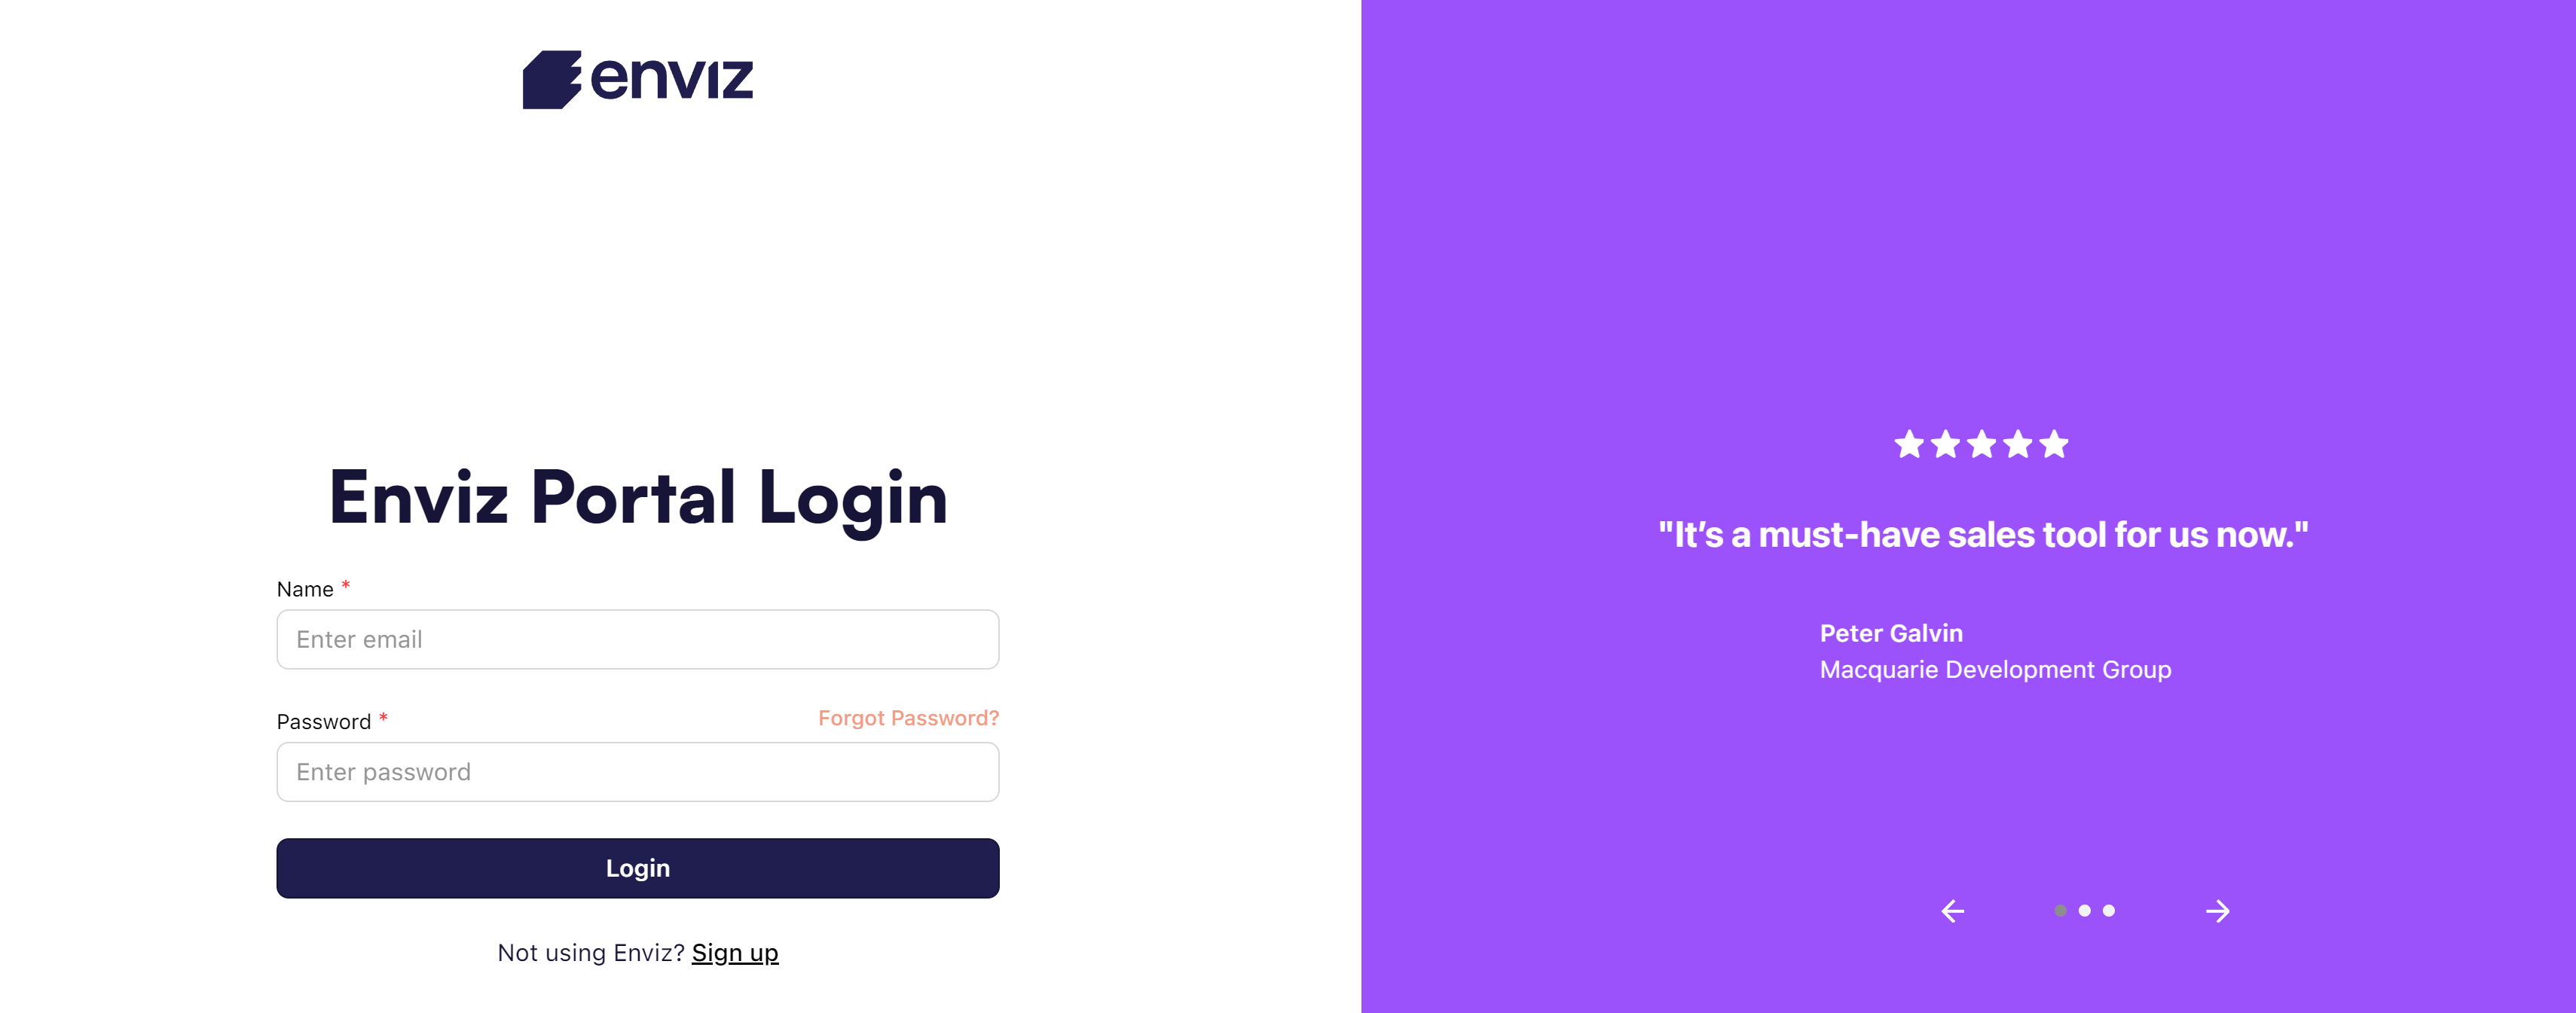
2. Watch our Welcome Video to give you an overview on how to navigate our portal.
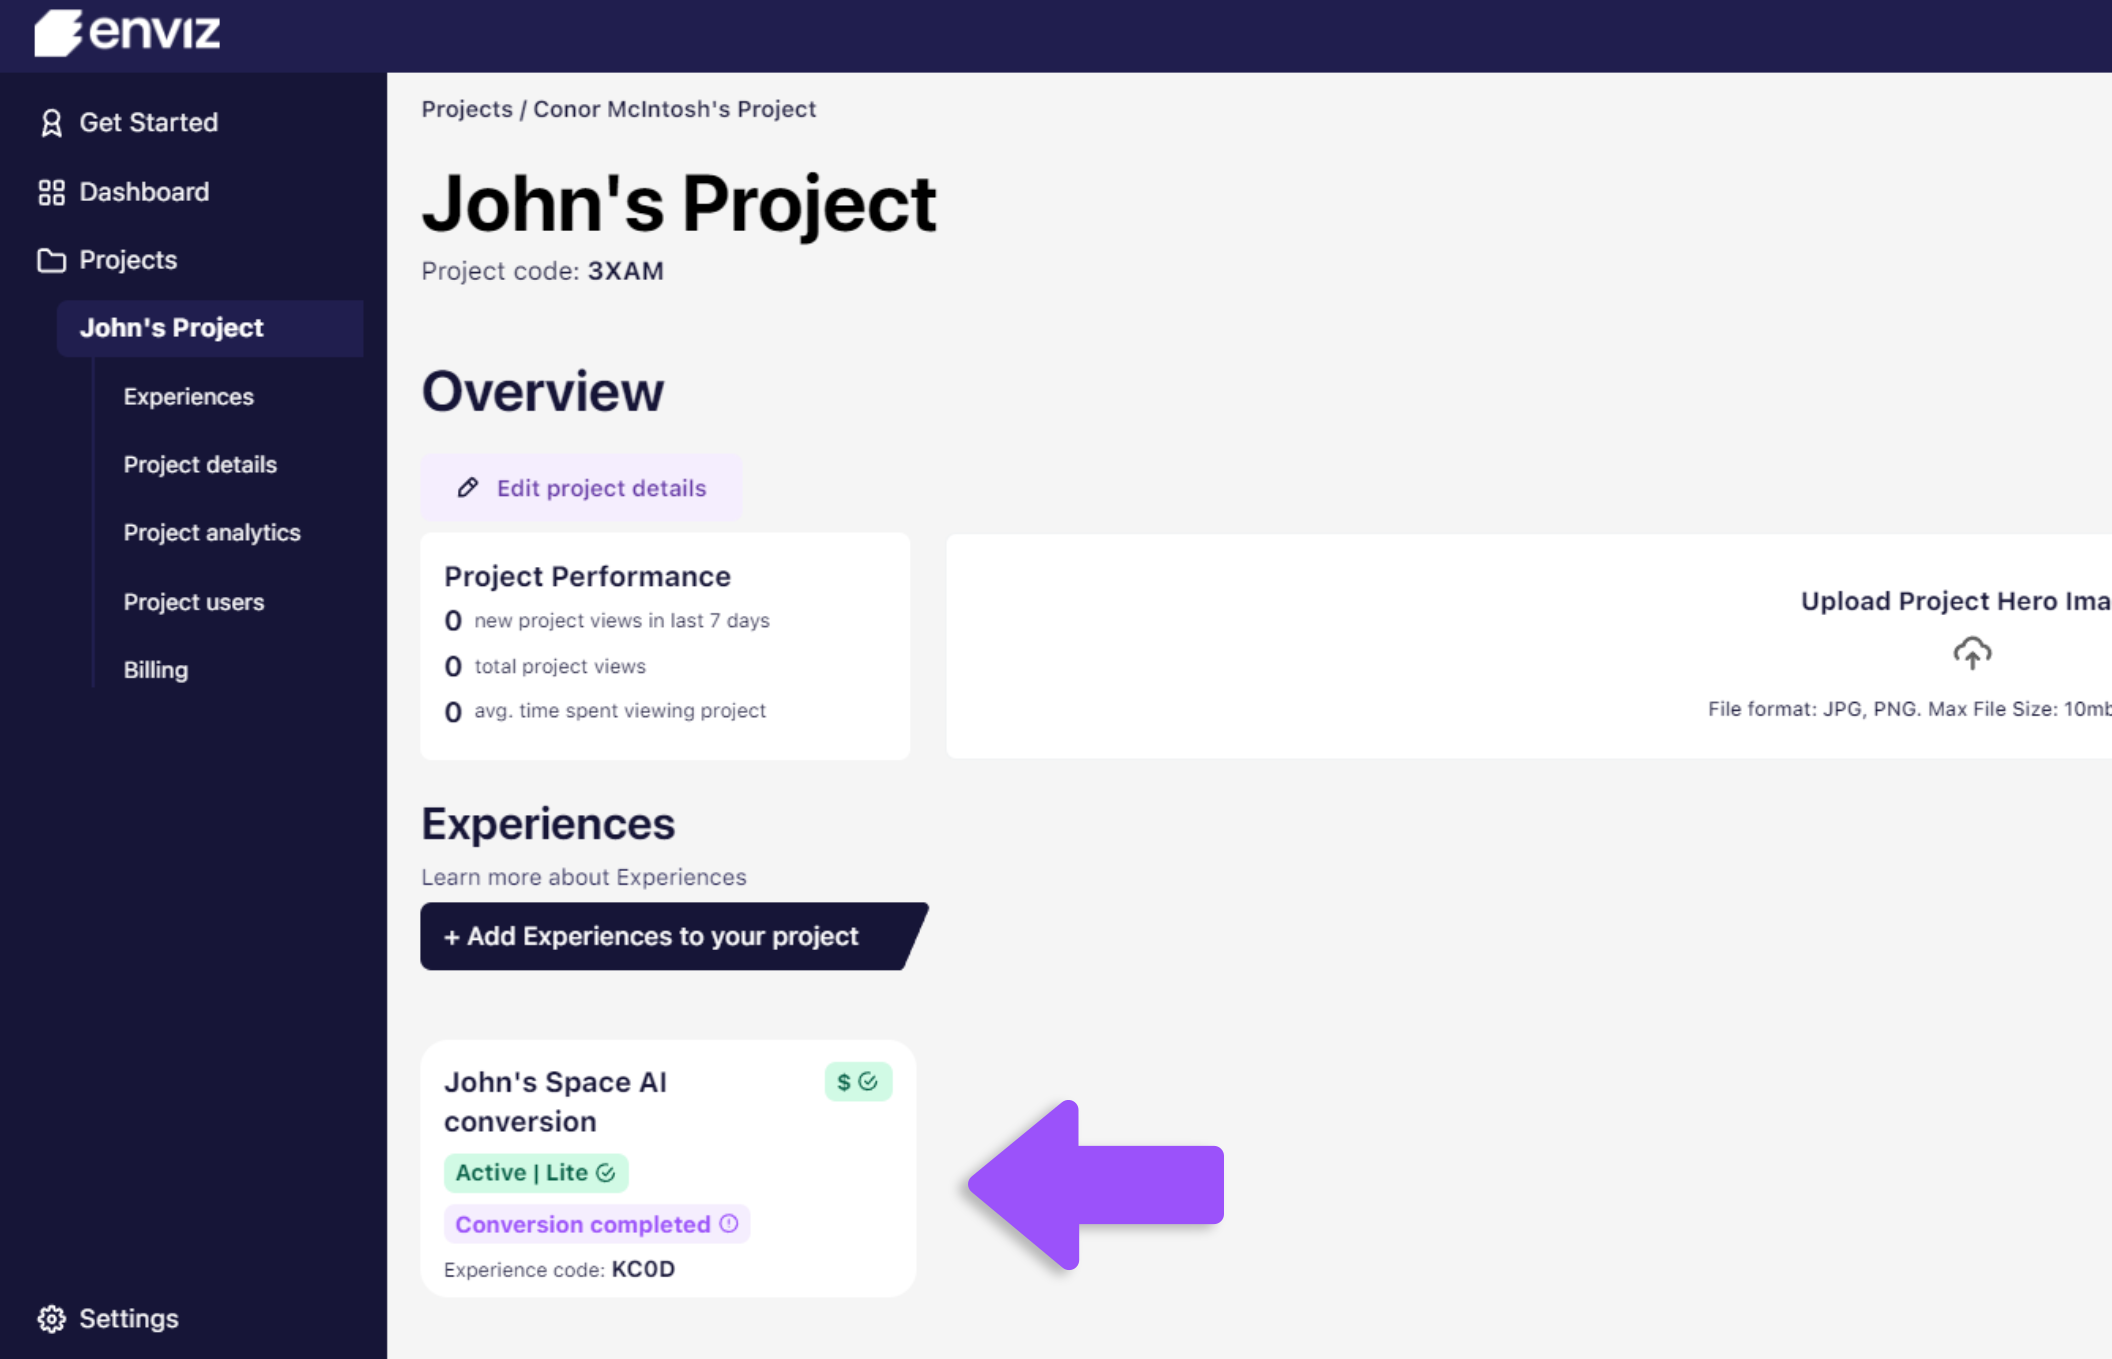
3. When logged into the Enviz portal, press ‘projects’.
4. Select your auto-generated project

5. Select your Space AI experience
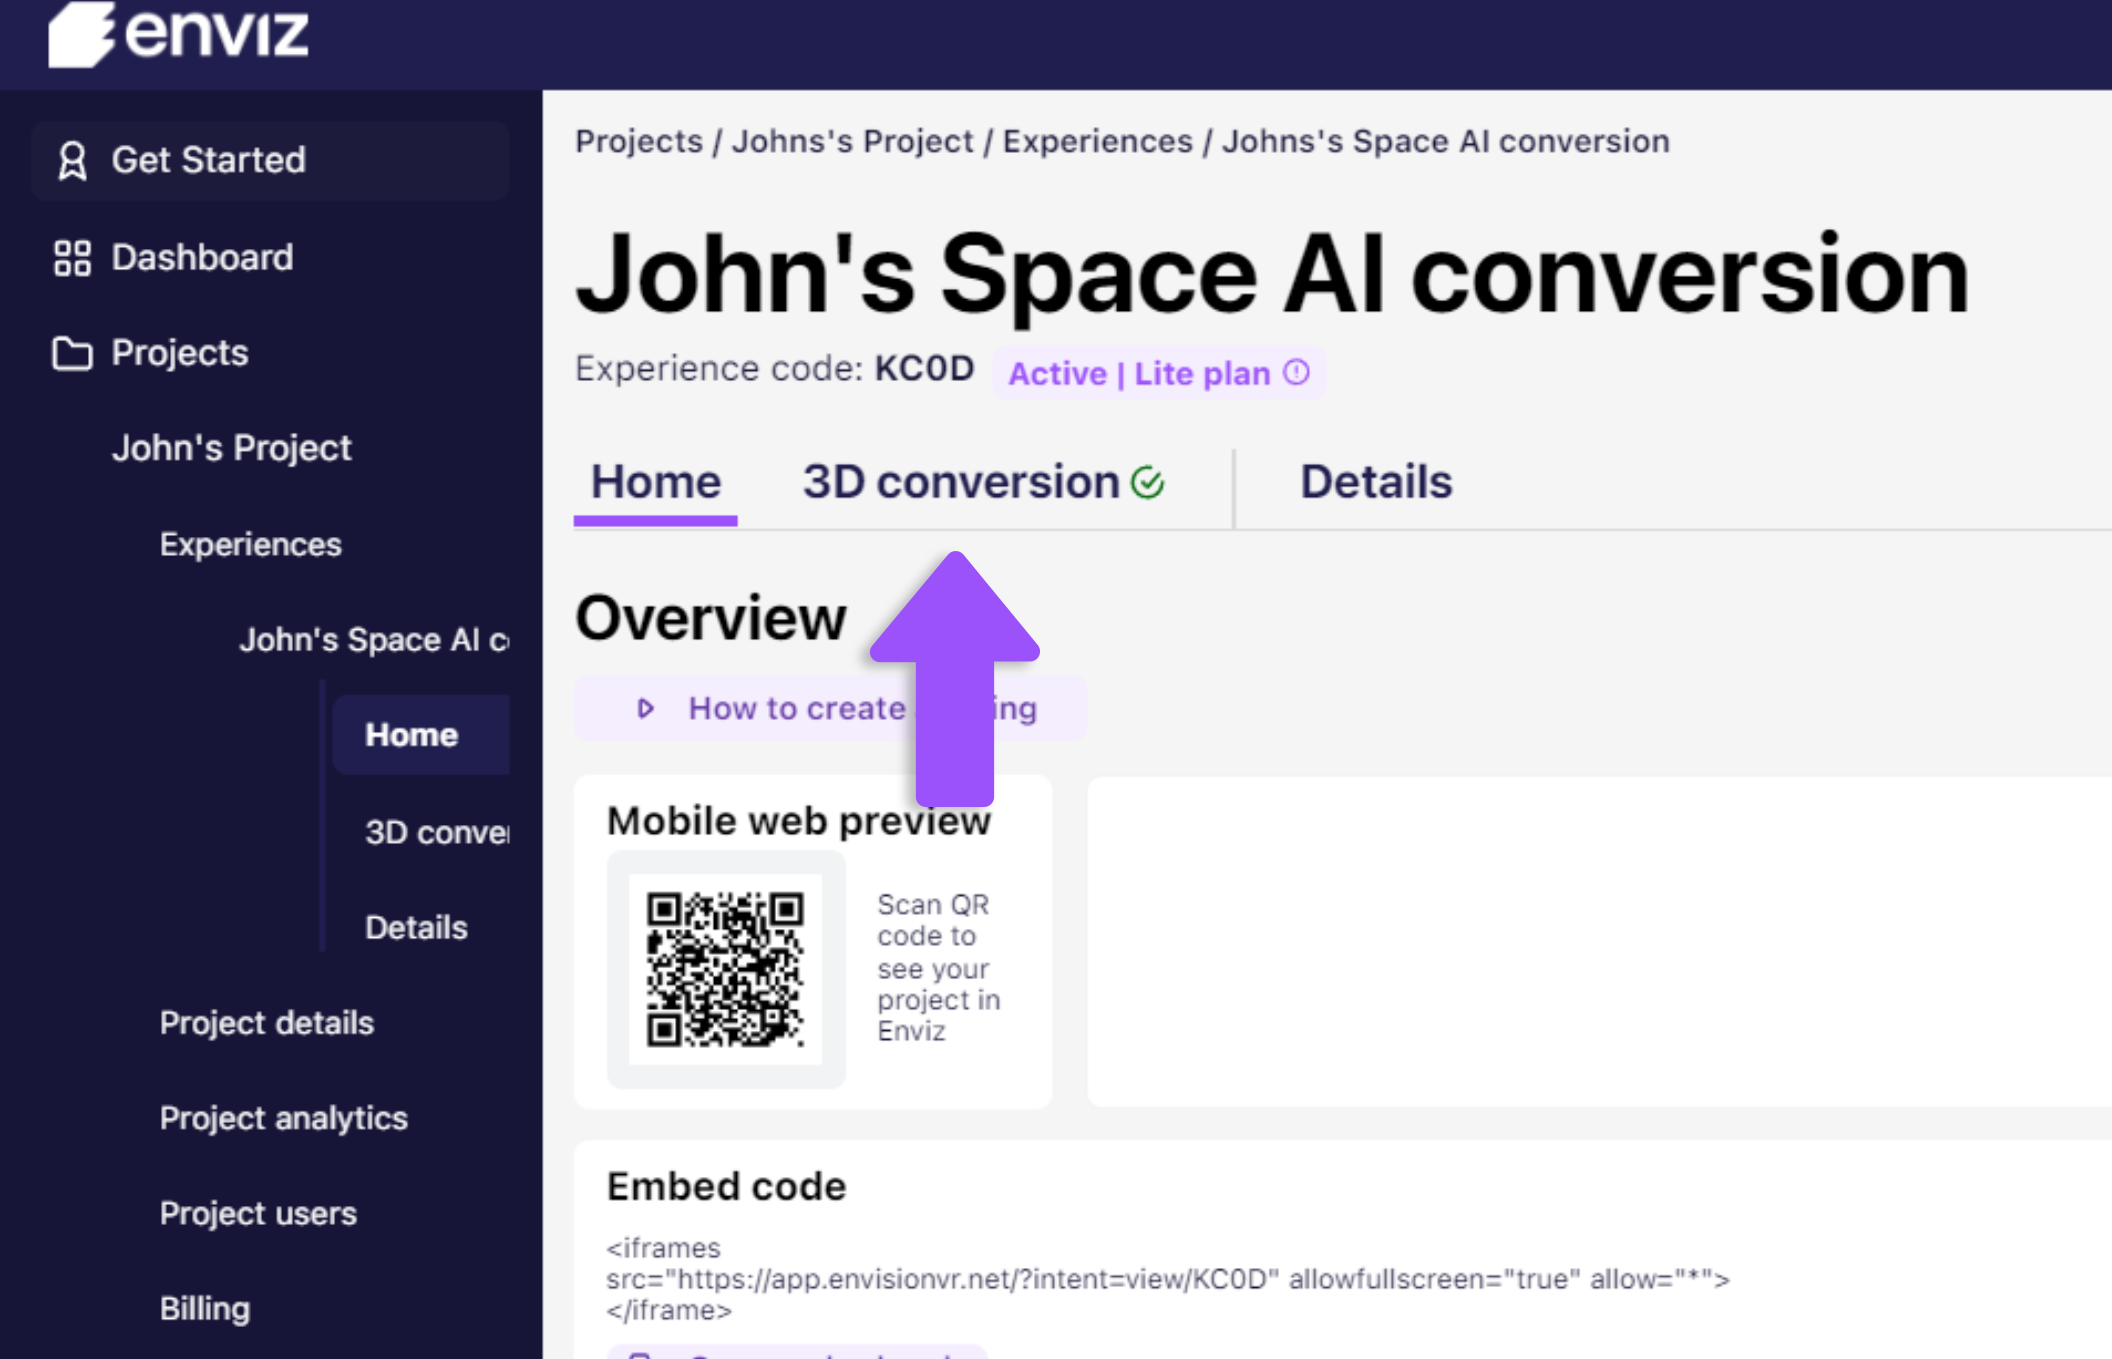
6. Select the ‘3D Conversion’ tab on your experience’s page.
7. Press the ‘Restart’ button to resubmit a model once you make any amendments
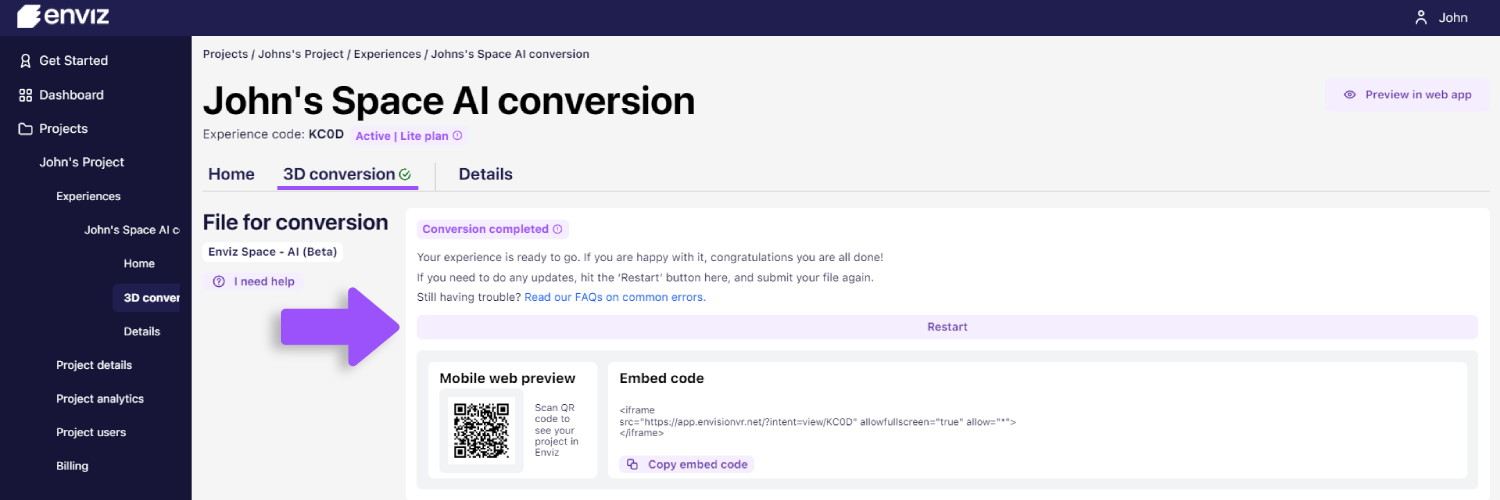
8. Clicking the reset button will clear your experience, letting you upload a new version of your .enviz file with any changes for resubmission. Just hit the ‘Get Started’ button to choose your new .enviz file.

9. After your file is uploaded you can press the ‘Submit files for 3D conversion’ button to get your revision started.

10. Return to this page. It will either display ‘failed’, ‘warning’, or provide deep links to the experience. After that, click on the confirmation popup.
11. After you've submitted, you'll stay on this page. You can use it to track the progress of your conversion, but we'll also email you all important updates along the way.
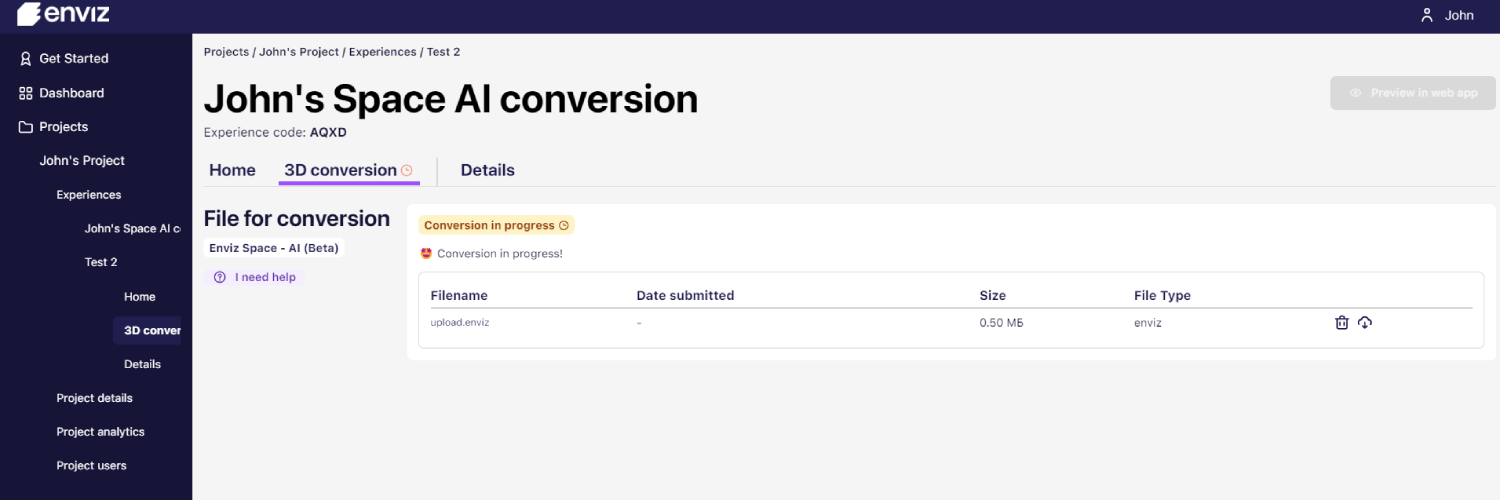
12. That's everything! We've covered the basics needed to navigate through the Space AI Beta. While we've only scratched the surface of what the portal offers, you can use it to edit your project details, experience collateral, and order other products Enviz has to offer. During this beta period, we're still working on automating many aspects to make this process as seamless as possible. If you have any feedback, please reach out to us in the Enviz Community Slack.
Enviz Community Slack
Not sure which implementation partner is right for your project?
